Step 2: Calendar Availability
Next step, we need to establish the availability settings for this particular calendar.
Appointment Slot Settings
Here you will see the availability slot and interval settings. These give you control over the time, length, and quantity of appointments scheduled.

-
1.Slot Duration This setting allows you to choose the length of your appointments. This will show when people are booking on your calendar so they know how the appointment should take.
-
2.Slot Interval Slot intervals show what times are available. For example, if you have a 30-minute slot interval, then your time slots will show availability every 30 minutes (10:00am, 10:30am, 11:00am, etc.)
-
3.Buffer Duration Between Appointments To give you or your team a break in between appointments, you can establish a buffer in between appointments. This helps prevent back-to-back appointments.
-
4.Appointments Per Slot You can choose to book multiple appointments per time slot as well. This works well in class or group situations where you would like more than one person in a meeting at the same time.
-
5.Appointments Per Day To prevent your day from being loaded with calls or appointments, you can establish a maximum number of appointments per day that can book on this calendar as well.
Scheduling Notice

-
1.Minimum Scheduling Notice Here is where you establish the time period for your minimum scheduling notice. You can choose between hours, days, weeks, or months.For example, if you choose “5 days”, then nobody will be able to book an appointment within 5 days of your next appointment on your calendar.
-
2.Date Range If you want to allocate a specific time range for your calendar to allow scheduling, you can do so here. For example, you can show appointments for the next 6 hours, 6 days, 6 weeks, or 6 months.
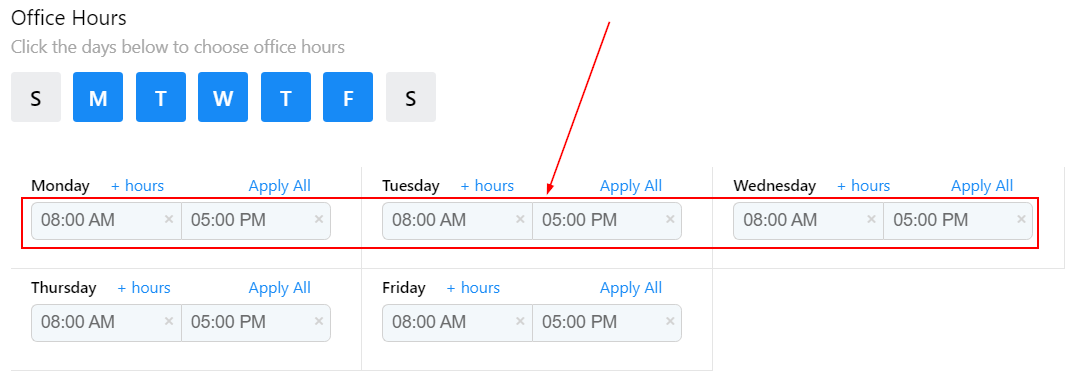
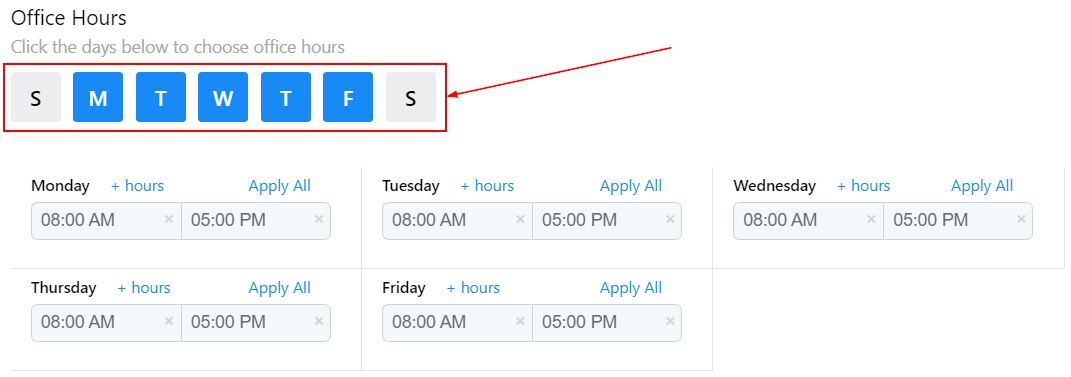
Office Hours
Here is one of the most important settings in this section, as it controls the availability time frames shown on your calendar on a weekly basis.
Days Of The Week Available
By clicking any of these “days of the week” buttons, you can turn on or off which days you are available for people to schedule on your calendar.
Time Of Day Available
When you are finished selecting the days of the week, you can customize each day to show availability at different times of the day.