Although your CRM will automatically add contacts into your system whenever there is a text, call, Facebook message, or email communication created, you can manually add a new contact into your CRM with this button.When you click on the button, it directs you to the information page where you can input the contact details.

Creating New Contacts
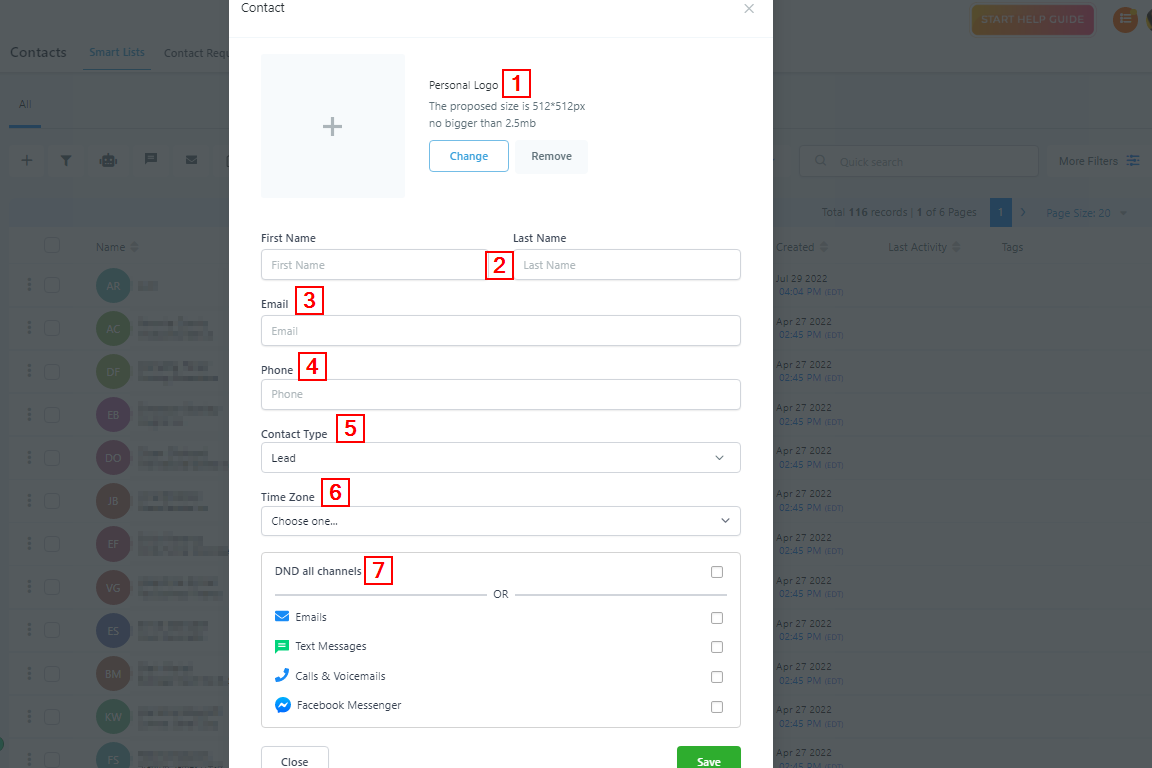
- Personal Logo: Here you can upload the business logo of each contact as a way to identify them especially if you have clients bearing the same name. The proposed size is 512*512px and not bigger than 2.5mb.
- First and Last Name: Type in the Contact’s First and last name in these spaces provided.
- Email: Type in the contact’s email address here**.**
- Phone: Type in the contact’s Phone number here**.**
- Contact Type: You either move the contact to the Lead type or the Customer type.
- Time Zone: Choose the timezone your contact is in. This will help you or any of your users know the best time to contact them.
- DND All Channel or some Channels: You can enable the Do Not Disturb notification here for all the social channels or some of the channels of the contact.
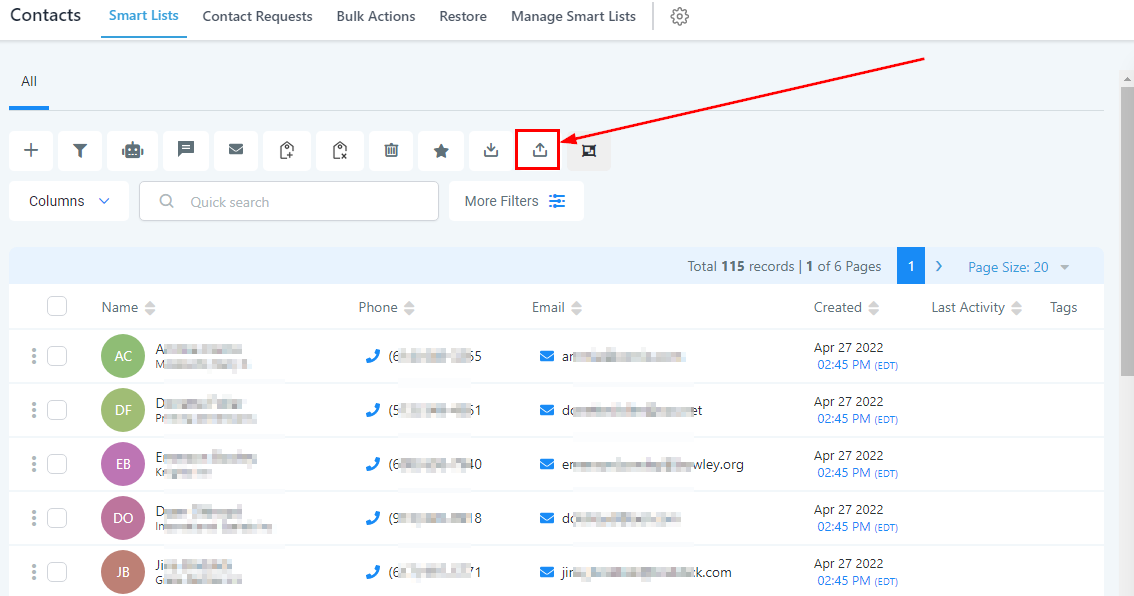
Uploading Contact Lists
If you need to import a single contact or a group of contacts from a different CRM or marketing campaign, you can upload your spreadsheet by selecting this button.
Importing Contacts
Your spreadsheet will need to have column headers that match the fields in this CRM.
Steps for Importing Contacts
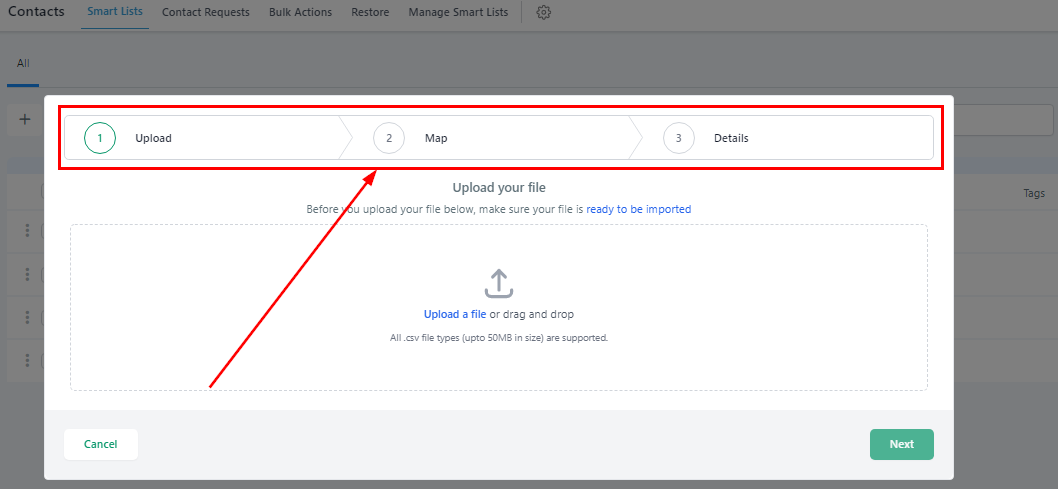
There are three (3) steps you take when importing contacts to your CRM; Upload, Map, and Details.
Upload

The first step is uploading the contacts from your device but before you upload the contact, make sure your file is ready to be imported;
All files being imported into the system must:
- Be a .csv file
- Have only one spreadsheet
- Be smaller than 50MB (tip: a typical .csv file with 4 columns and 10,000 records will be ~500kb in size)
- Include a header row in which at least one column header corresponds to a field in the system (i.e the First and last name, Phone number, Email et.c.) for;
- Uploading ONLY New Records in the system
- Choose ‘Add New Records’ in Step 3 of the Import Flow
- Updating ONLY Existing Records in the system
- Choose ‘Update Contact Records’ in Step 3 of the Import Flow. Or,
- Both
- Choose ‘Both’ in Step 3 of the Import Flow
Map

Here you can match your column from your imported file with the corresponding contact field in the system. You can also preview your matched information in the preview column.
NOTE