- There are 3 ways you can anchor/ scroll to elements or sections within website or funnel:
- Method 1: Hyperlinking the Text element within the builder
- Method 2: Using a button element in the builder
- Button Option 1 - Website URL
- Button Option 2 - Scroll to element
- Method 3: Using the Navigation Menu element in the builder
- Quick Tips & How-to:
- Linking "Table of Contents" items to their corresponding sections
- Linking "Terms of Service" for quick access to important sections
- Linking sections of your "scripts" for staff when handling prospects
- Linking your "Navigation Menu" to the Pricing table that is located in a specific section of your funnel/ website
- "Book a Call" button that links to a booking widget in another funnel or website
- Specific Video located in a section of a funnel/ website
- Multiple buttons to one section of your website/funnel like an optin form ect
- Lets take a look at how you would find your #CSS SELECTOR ID
- Method 1:
- Hyperlinking the Text element within the builder
- Method 2:
- Using a button element in the builder
- Button Option 1 - Website URL
- Button Option 2 - Scroll to element
- 5. BONUS - How to label your sections
- Method 3:
- Using the Navigation Menu element in the builder
There are 3 ways you can anchor/ scroll to elements or sections within website or funnel:
Method 1: Hyperlinking the Text element within the builder
Method 2: Using a button element in the builder
Button Option 1 – Website URL
Button Option 2 – Scroll to element
Method 3: Using the Navigation Menu element in the builder
Quick Tips & How-to:
- In order to anchor/ scroll within the same funnel/website, you will need to use the CSS selector ID (How to find your #CSS SELECTOR ID)
- In order to anchor/ scroll to a section in another funnel/website page please use the page URL with the CSS selector ID appended at the end:
Ex: https://www.URL.com/funnelpath#CSS SELECTOR
(This will also work for subdomains)
Some common use cases to use anchor/ scroll to elements are:
-
Linking “Table of Contents” items to their corresponding sections
-
Linking “Terms of Service” for quick access to important sections
-
Linking sections of your “scripts” for staff when handling prospects
-
Linking your “Navigation Menu” to the Pricing table that is located in a specific section of your funnel/ website
-
“Book a Call” button that links to a booking widget in another funnel or website
-
Specific Video located in a section of a funnel/ website
-
Multiple buttons to one section of your website/funnel like an optin form ect
Lets take a look at how you would find your #CSS SELECTOR ID
1. Head into the Builder
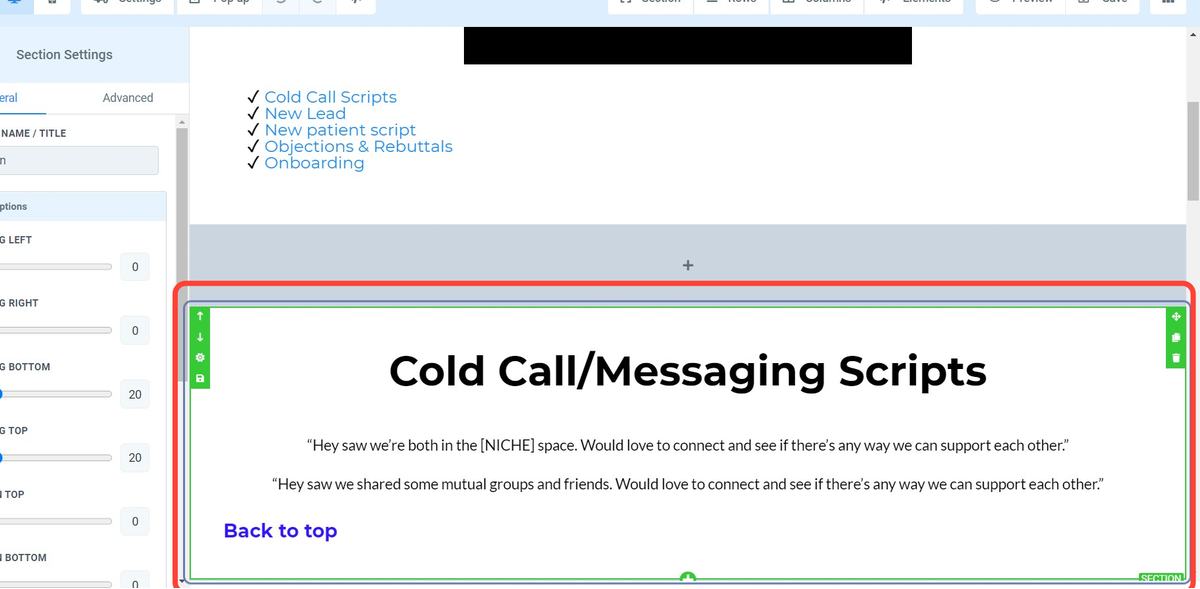
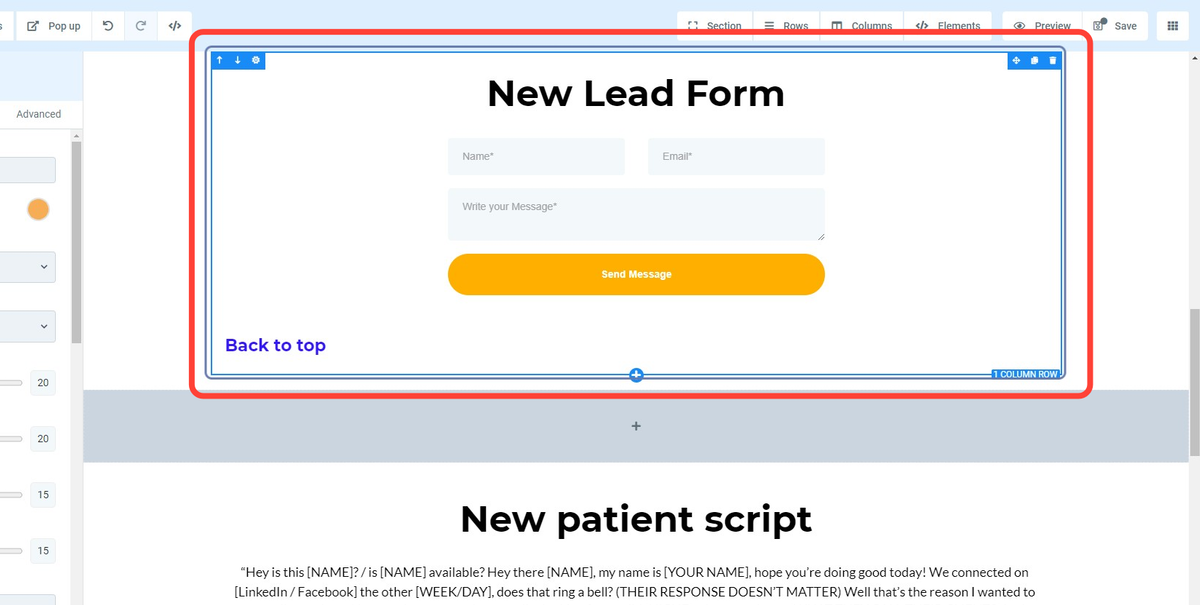
Click on the section you would like to anchor/ scroll too. Make sure the section or element is highlighted (green in this case).
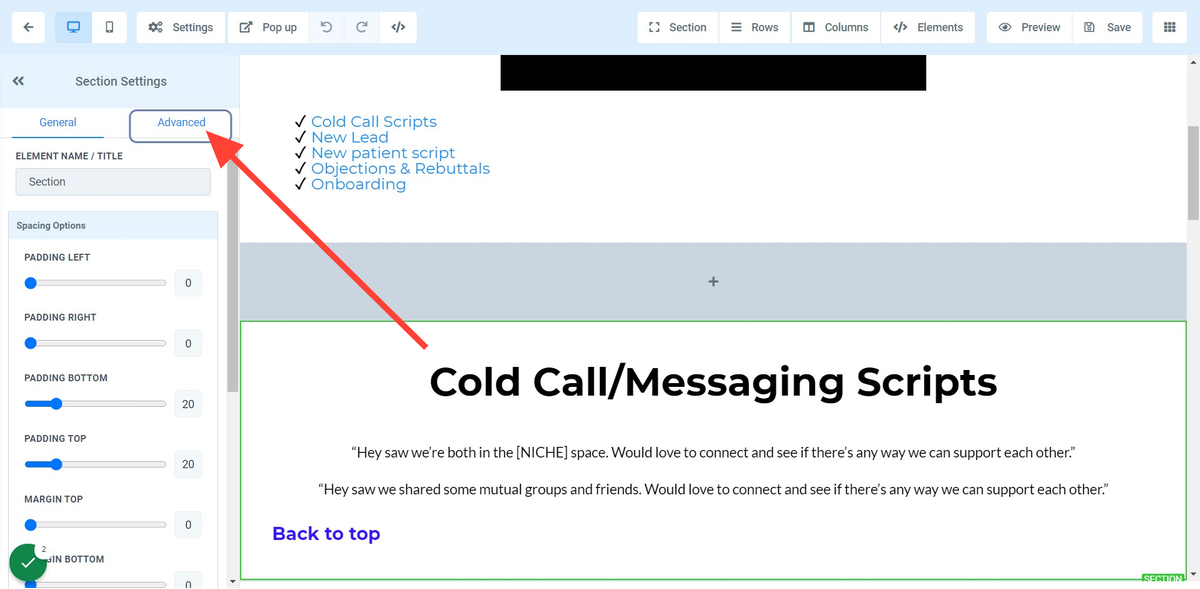
2. Click on Advanced in the left menu
Scroll down to the bottom of the left menu until you see CSS selector.
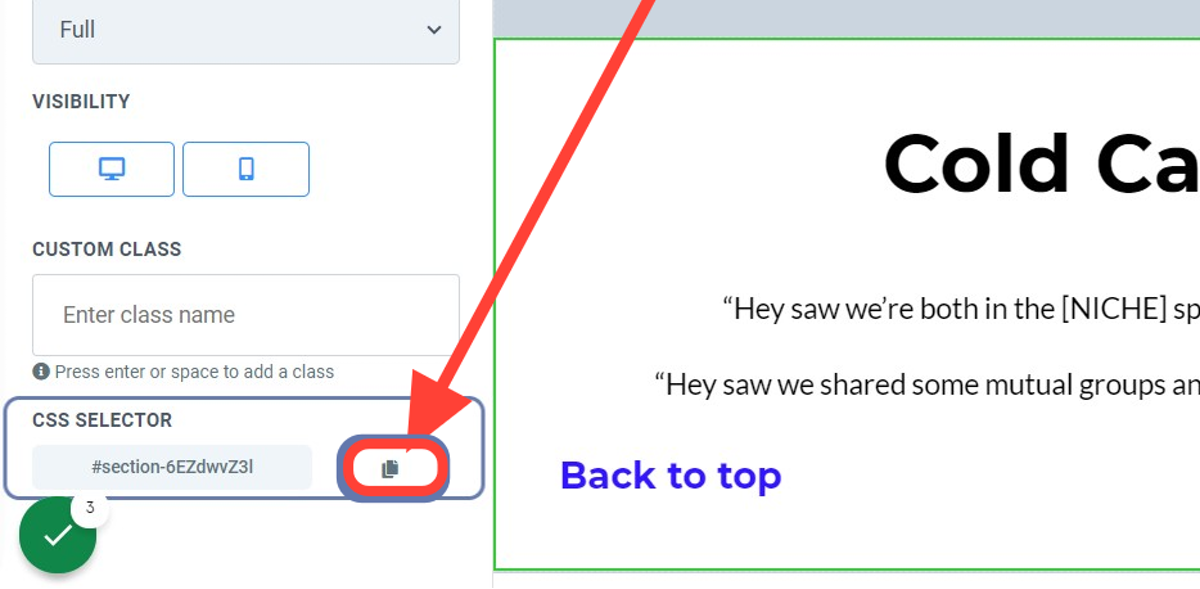
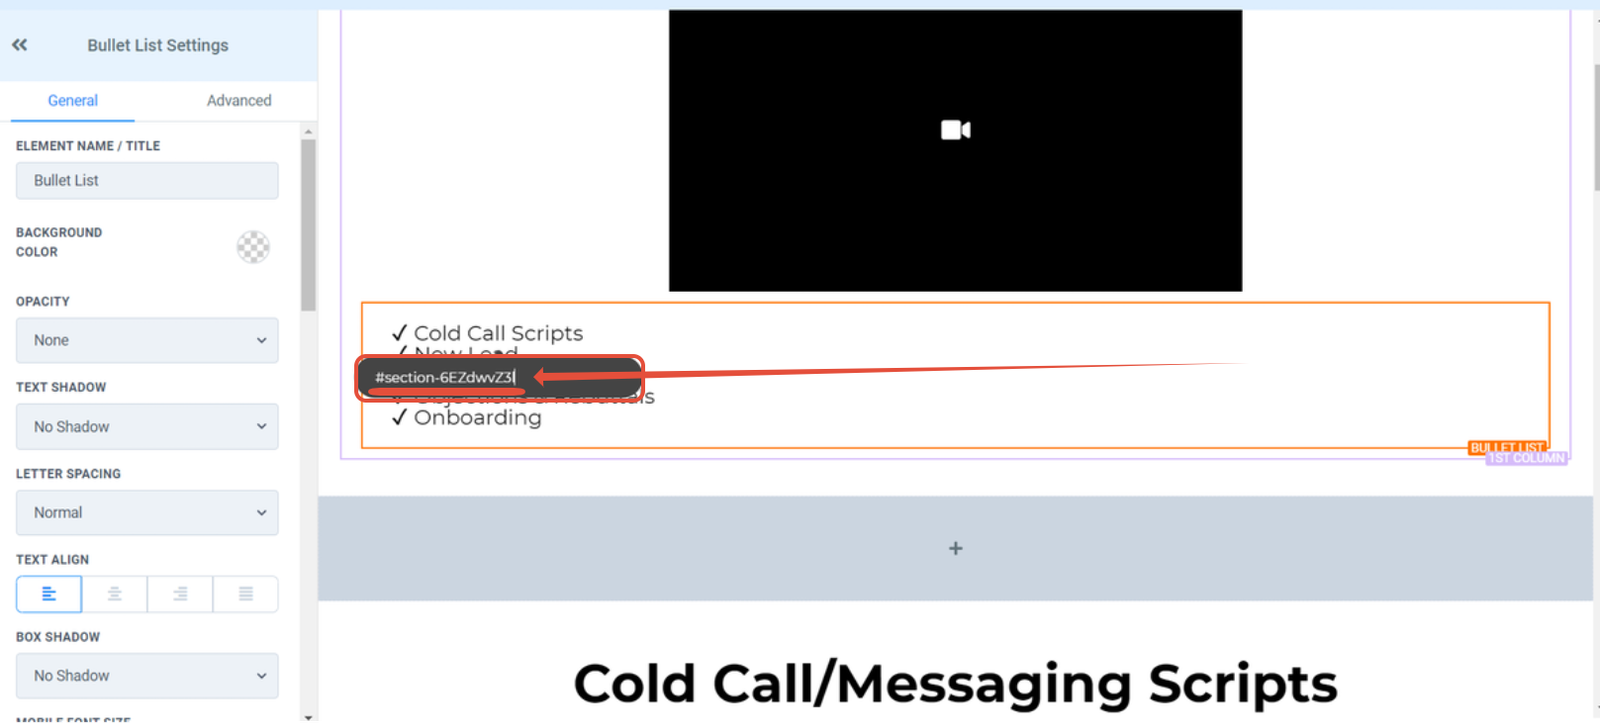
3. Click on CSS SELECTOR copy button
Copy text area titled: #section-6EZdwvZ3l by clicking on the button
Method 1:
Hyperlinking the Text element within the builder
1. Drag highlighted text you wish to link your section too.
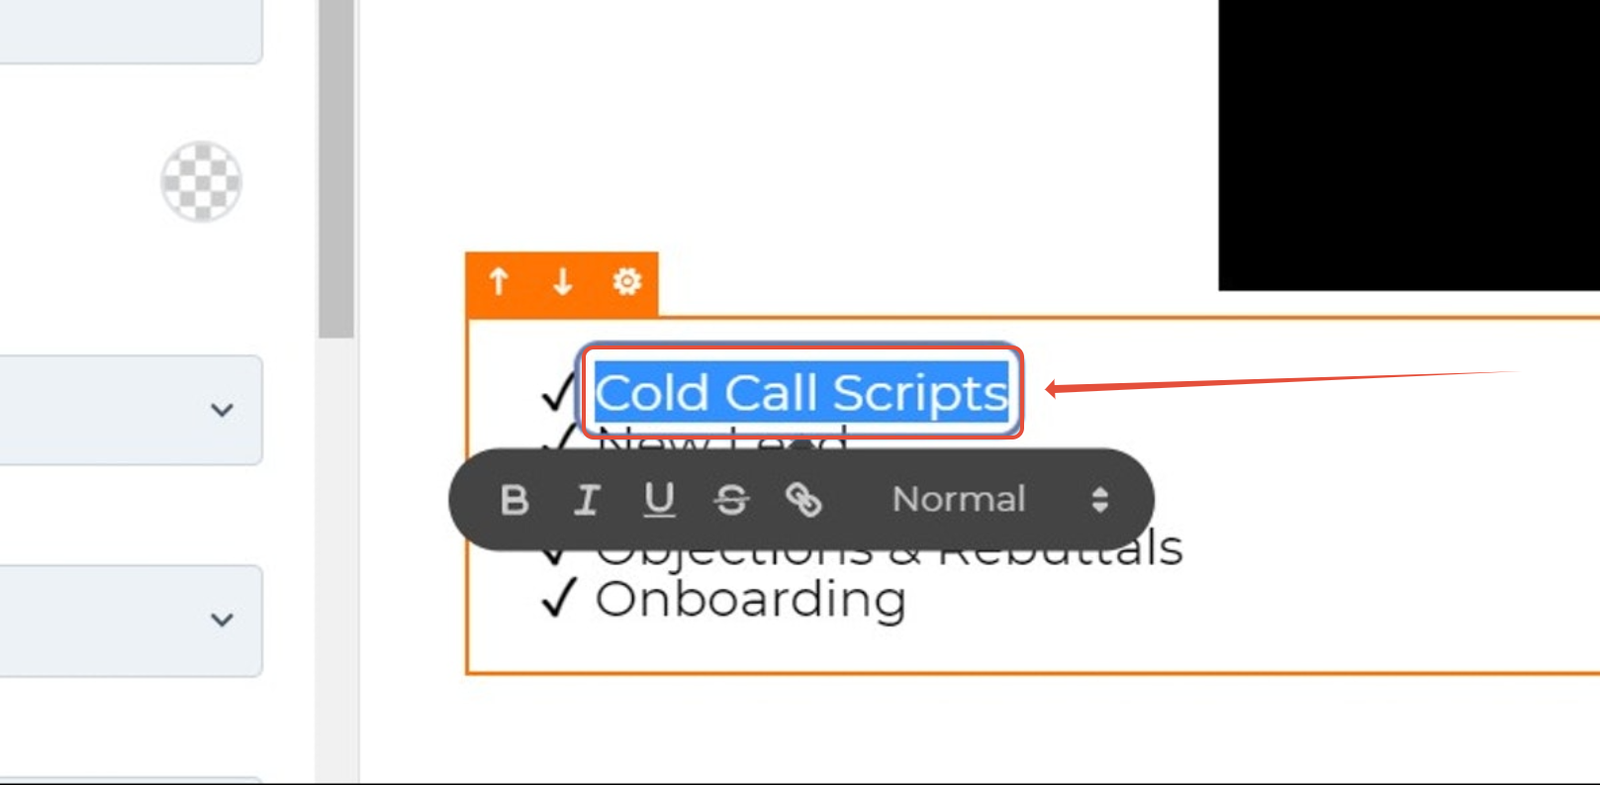
2. Click on the “link” button
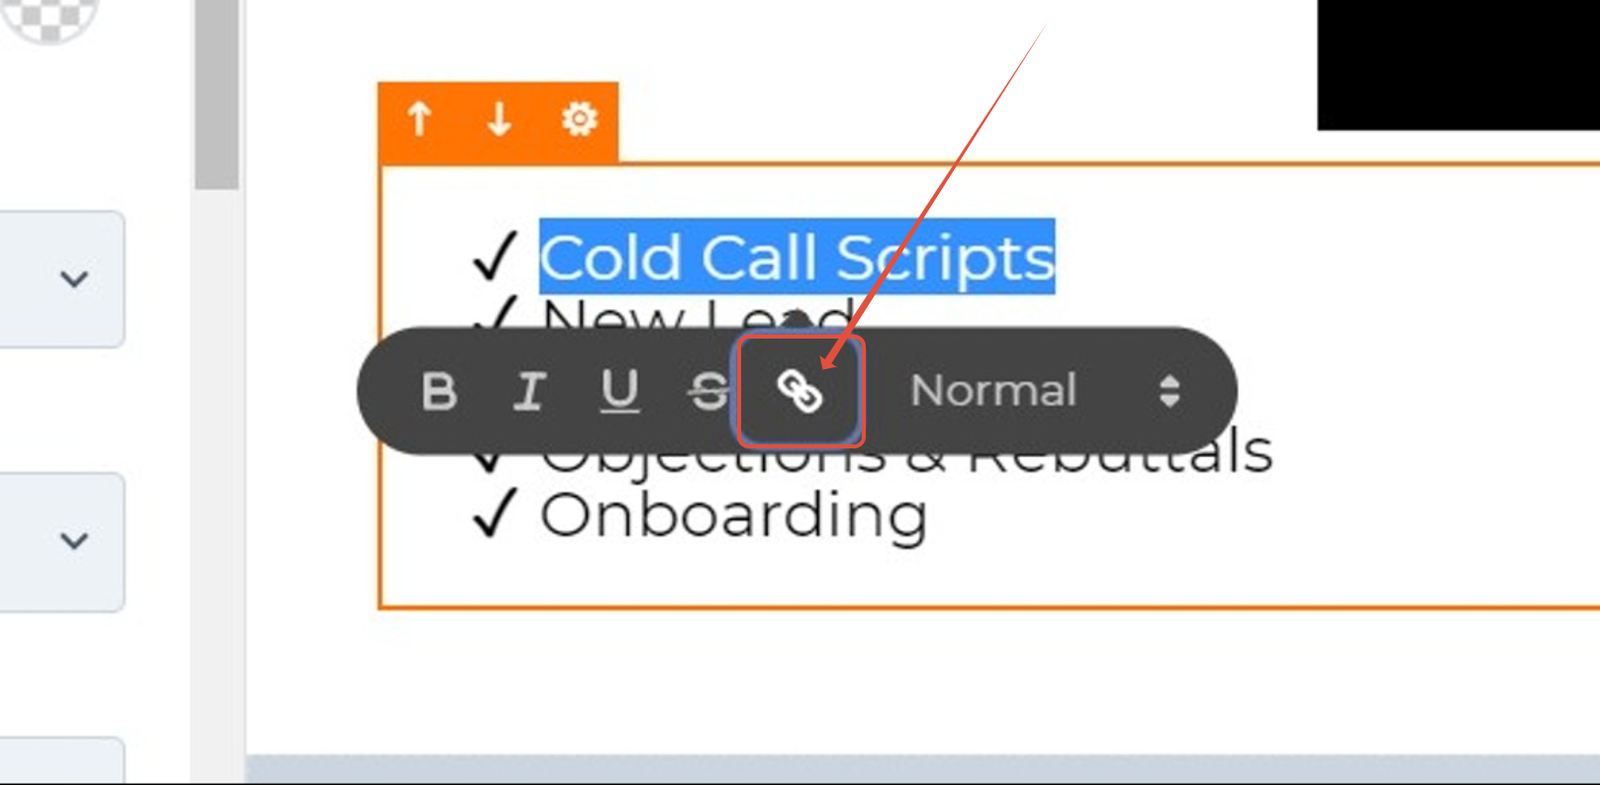
3. Paste “#section-6EZdwvZ3l” into input field
NOTE:
To Anchor to another funnel/website section within your system please use the full
page URL with the CSS selector ID appended at the end:

Ex: https://www.URL.com/funnelpath#CSSSELECTORID
This will also work for subdomains
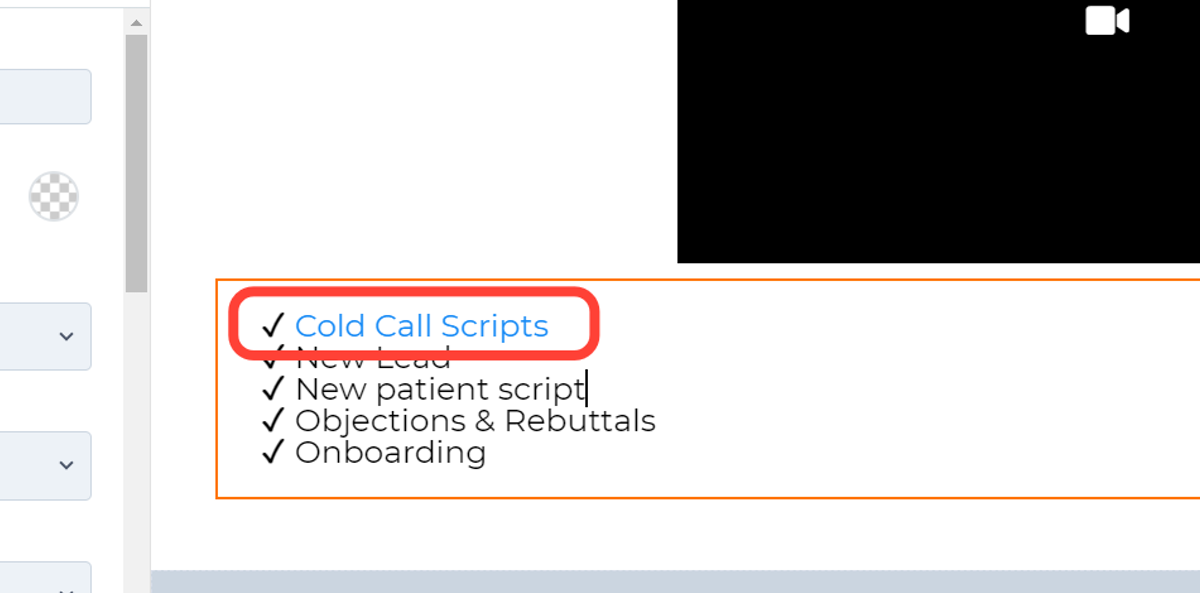
4. Hit “Enter” to make sure changes are saved.
You will know once changes are saved as the highlight text will now be highlighted blue. Viola that’s it =)
Method 2:
Using a button element in the builder
There are 2 primary ways to link a specific section of a page to a button within the funnel/ website builder (circled in red).
Option 1: “Website URL”
Ideal for linking across different funnel & website pages. This is achieved by inputting the page URL with the #CSS SELECTOR ID appended at the end.
Ex: https://www.URL.com/funnelpath#CSS SELECTOR
(This will also work for subdomains)
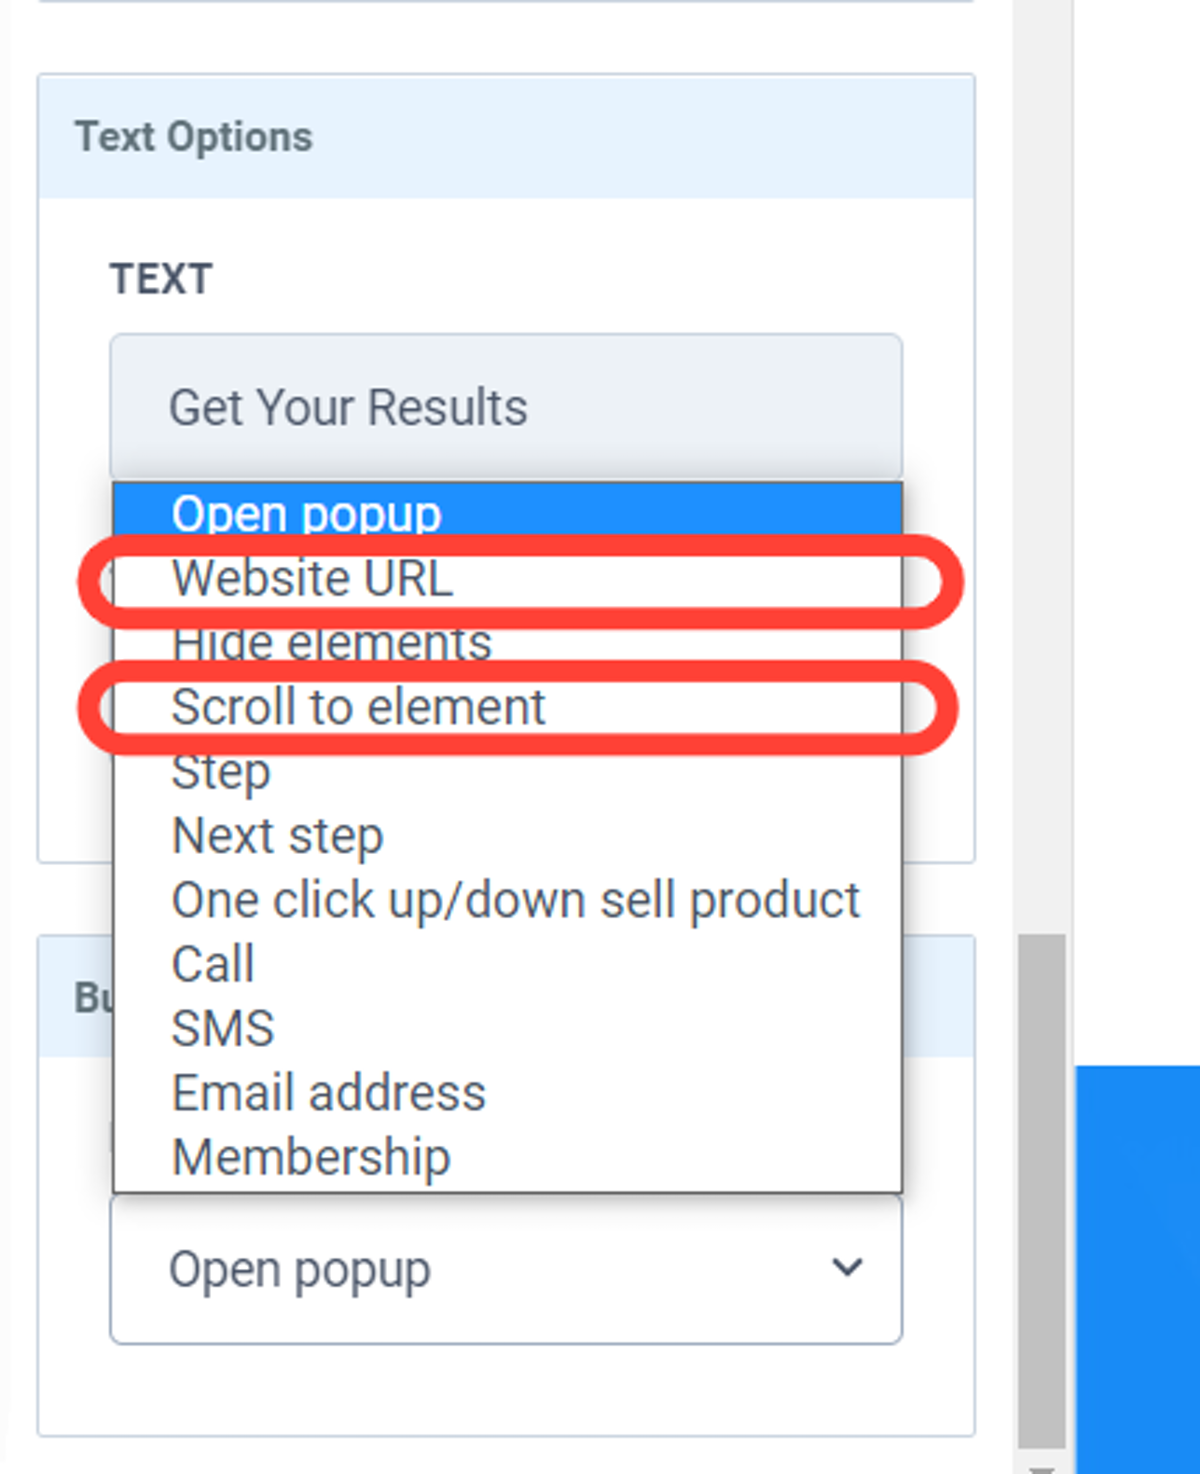
Option 2: “Scroll to element”
Ideal for linking sections within the same funnel page. Please select “Scroll to element” option in the field below and select the section within the page you wish to anchor/ scroll too.
Button Option 1 – Website URL
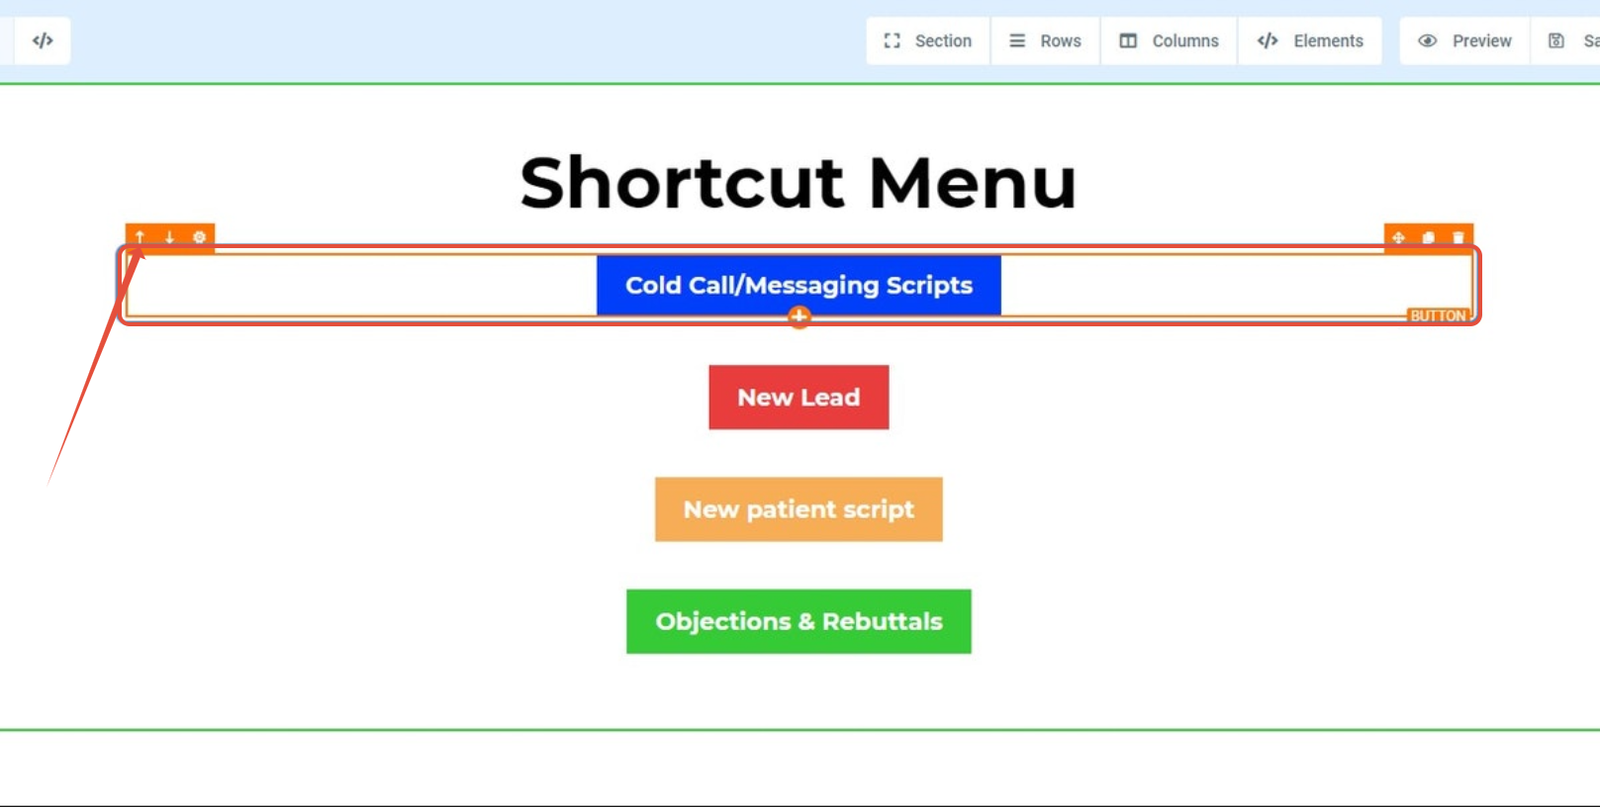
1. Click on the button you wish to link a section too
In this example we will be linking a button to a section from another page within the system.
Please proceed to click on the button. A highlighted box (orange) will appear when the button is selected.
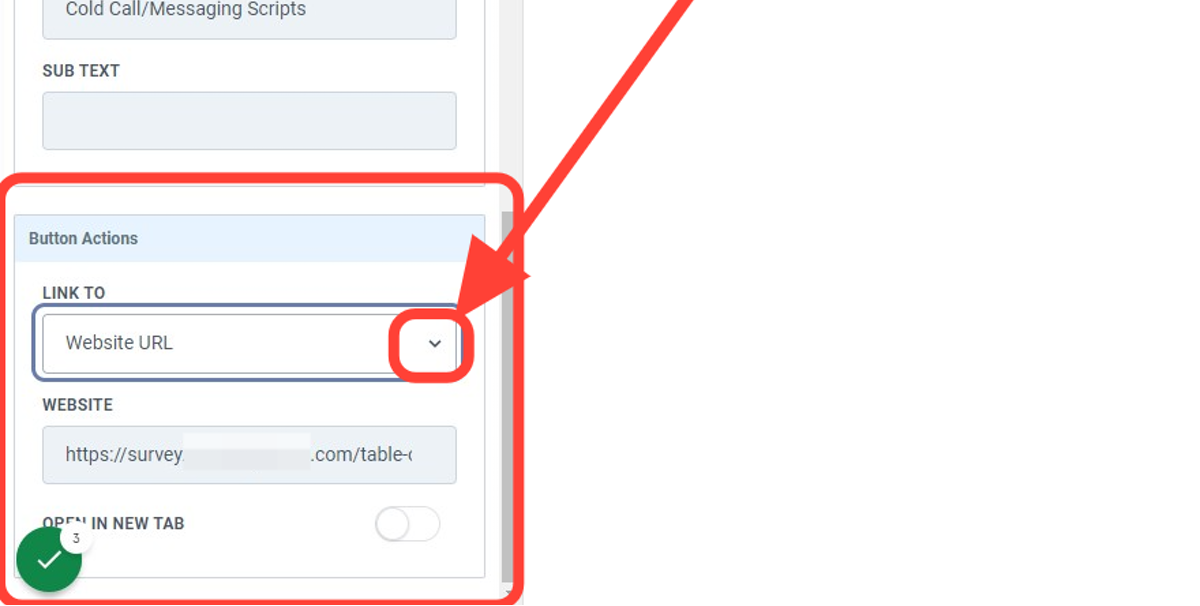
2. Click on the dropdown menu located at the bottom of the left side
Click on the dropdown menu located at the bottom of the left side menu
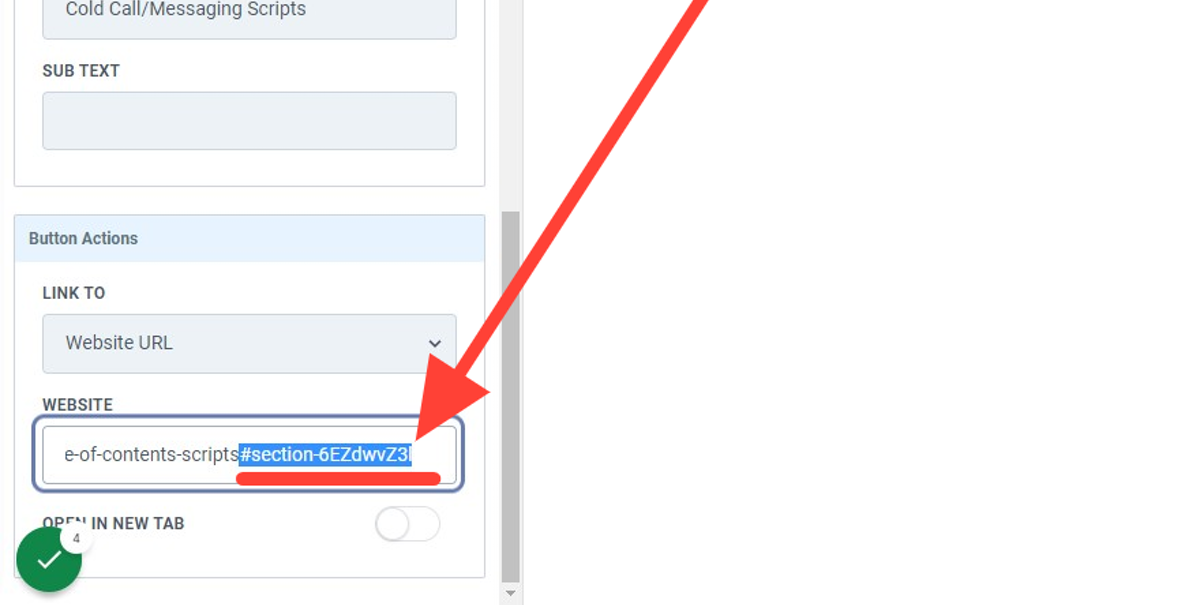
3. Paste the URL plus CSS Selector in the input field
Next lets grab the page URL and append the CSS selector ID to the end.
Ex: https://www.URL.com/funnelpath#CSS SELECTOR
(This will also work for subdomains)

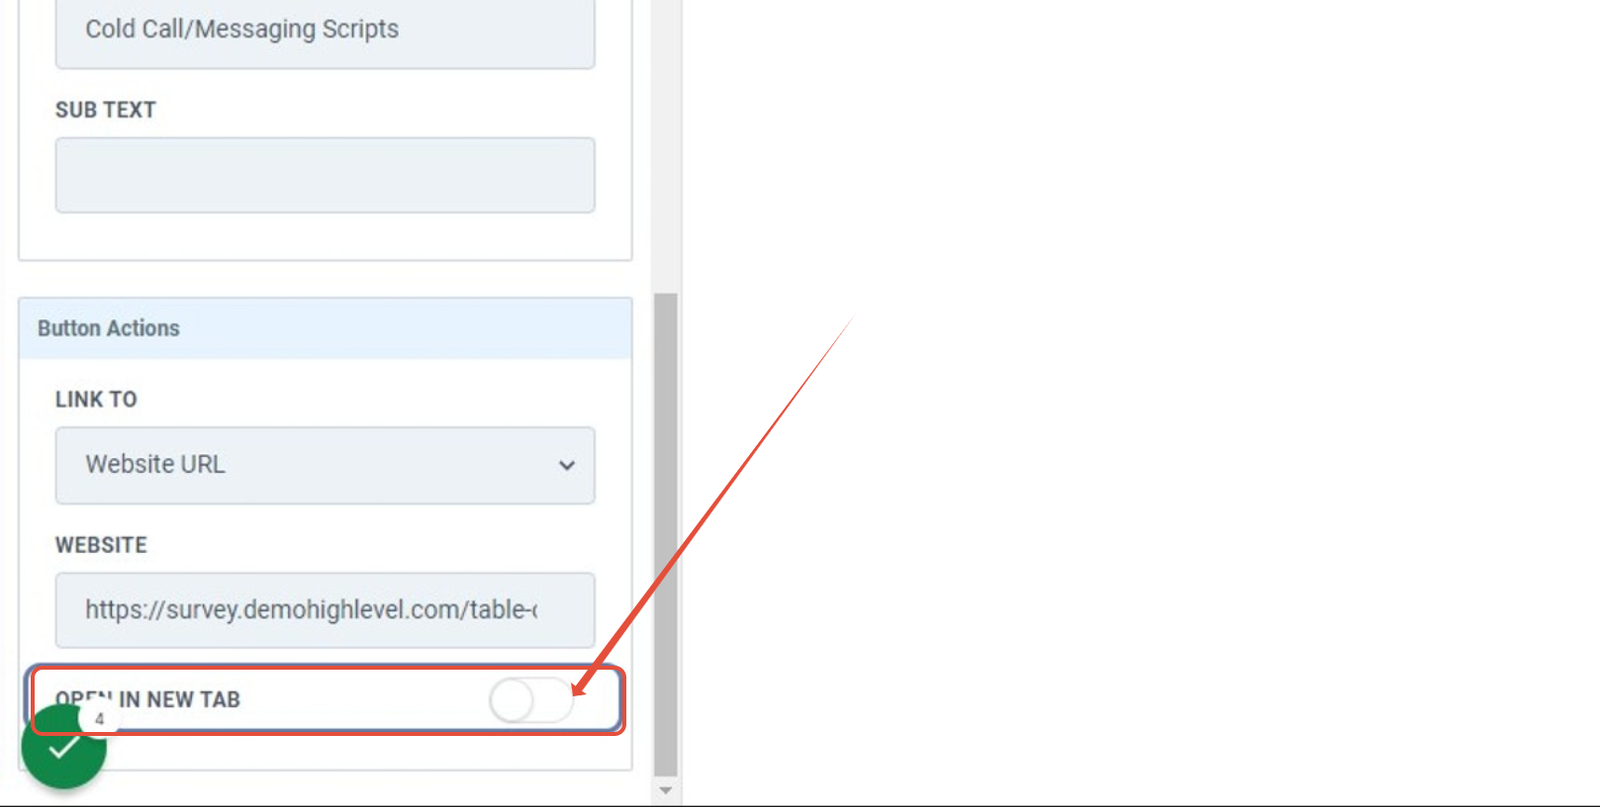
4. Select the action you would like to happen when the button is clicked
If you would like your link to open in a new tab please toggle this on.
Make sure to hit “Save” in the top right hand corner and that’s it.
Button Option 2 – Scroll to element
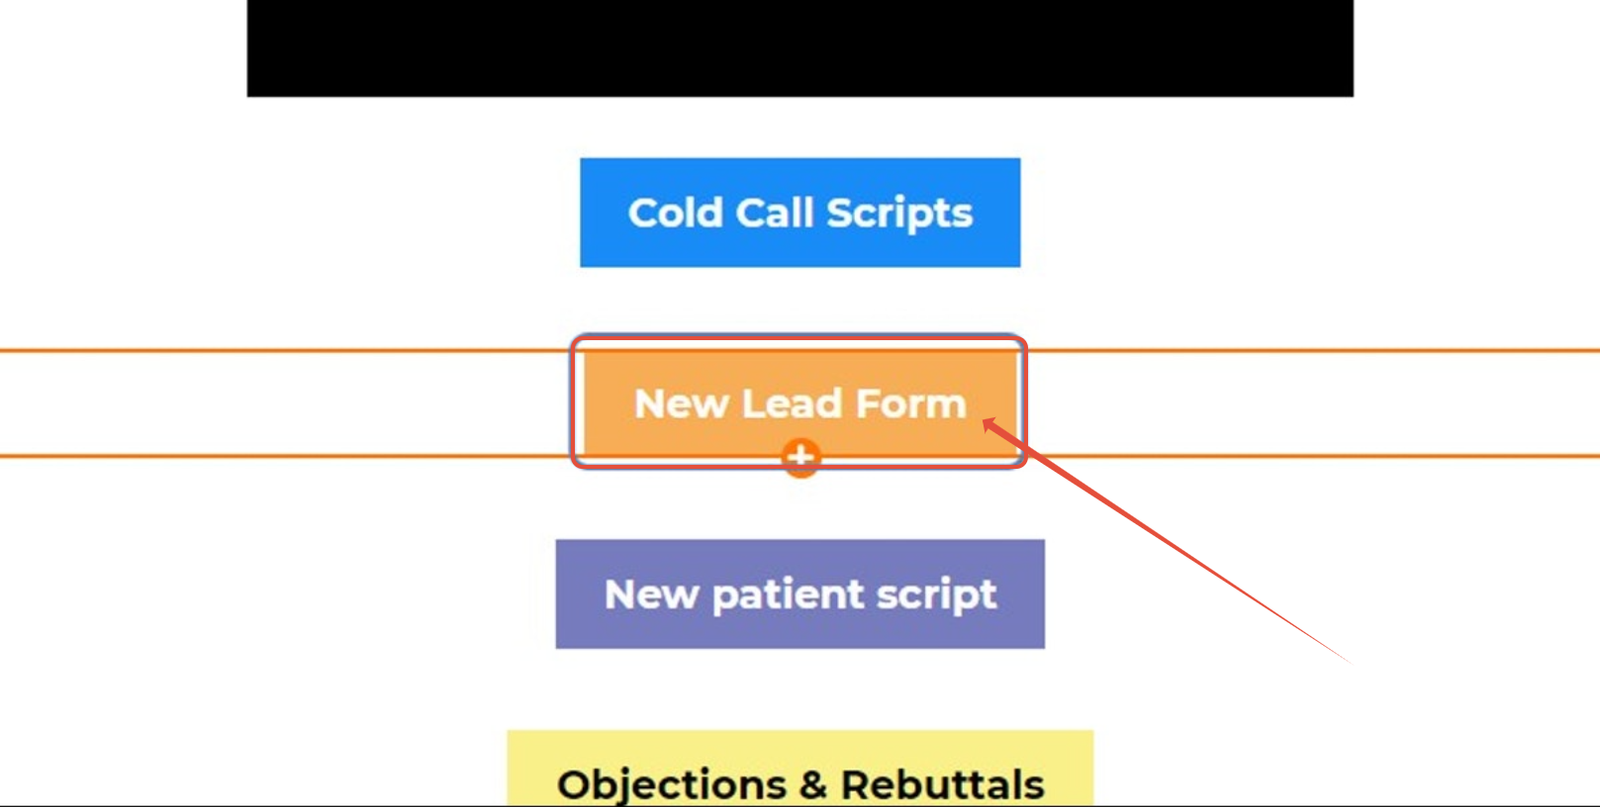
1. Click on the button you wish to link a section too
A highlighted box (orange) will appear when the button is selected.
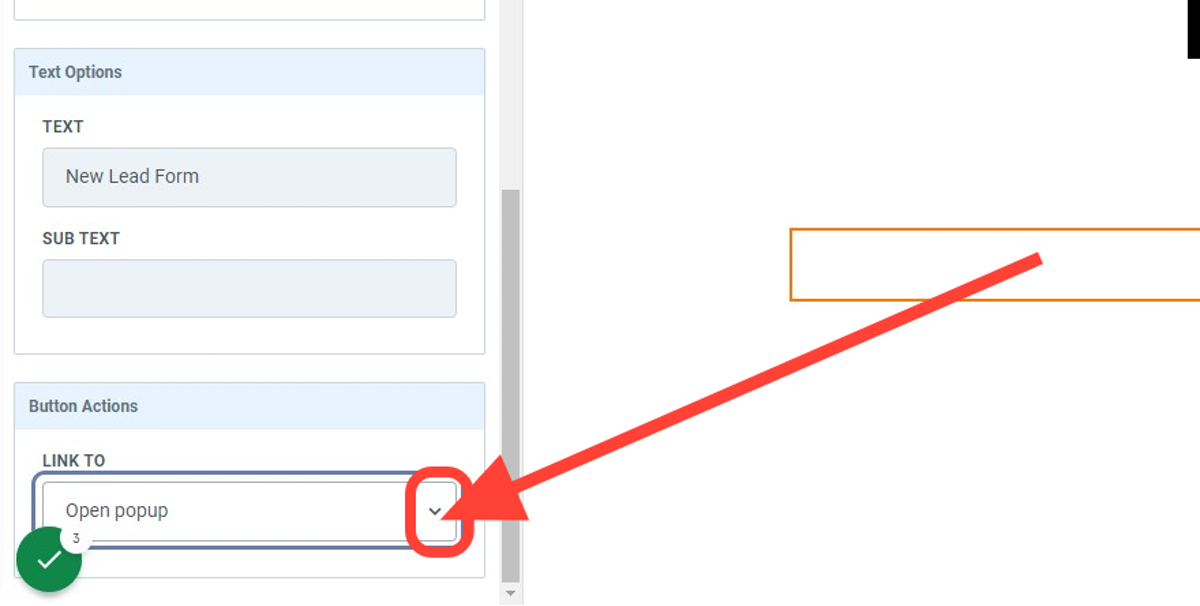
2. Click on the “Button Actions” dropdown menu located at the bottom left side
Click on drop down menu and select “Scroll to element” option
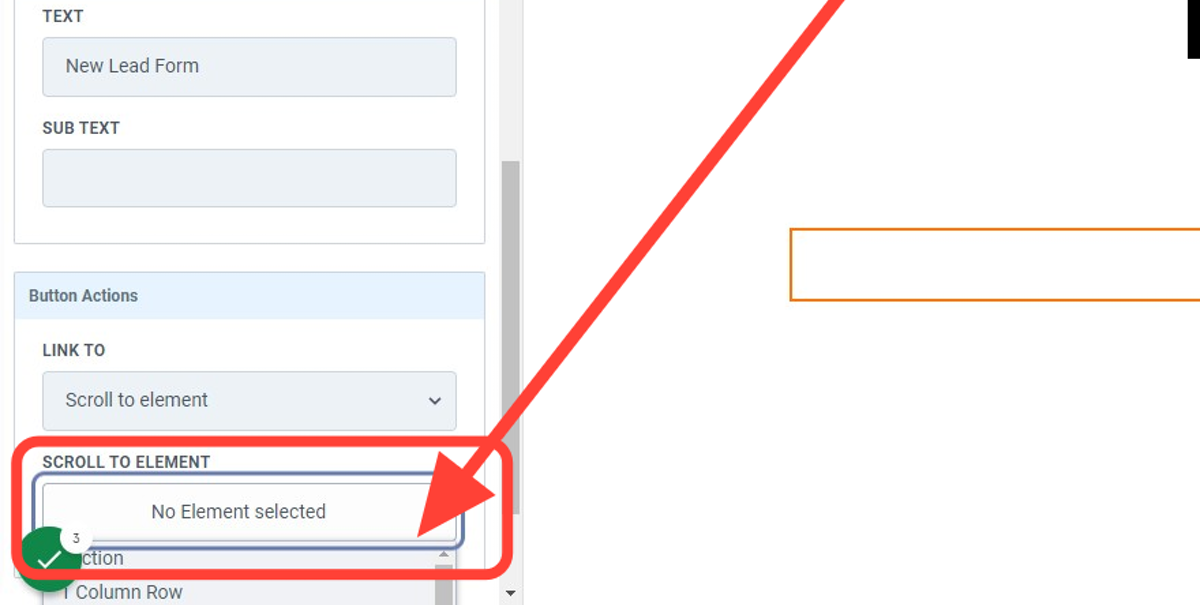
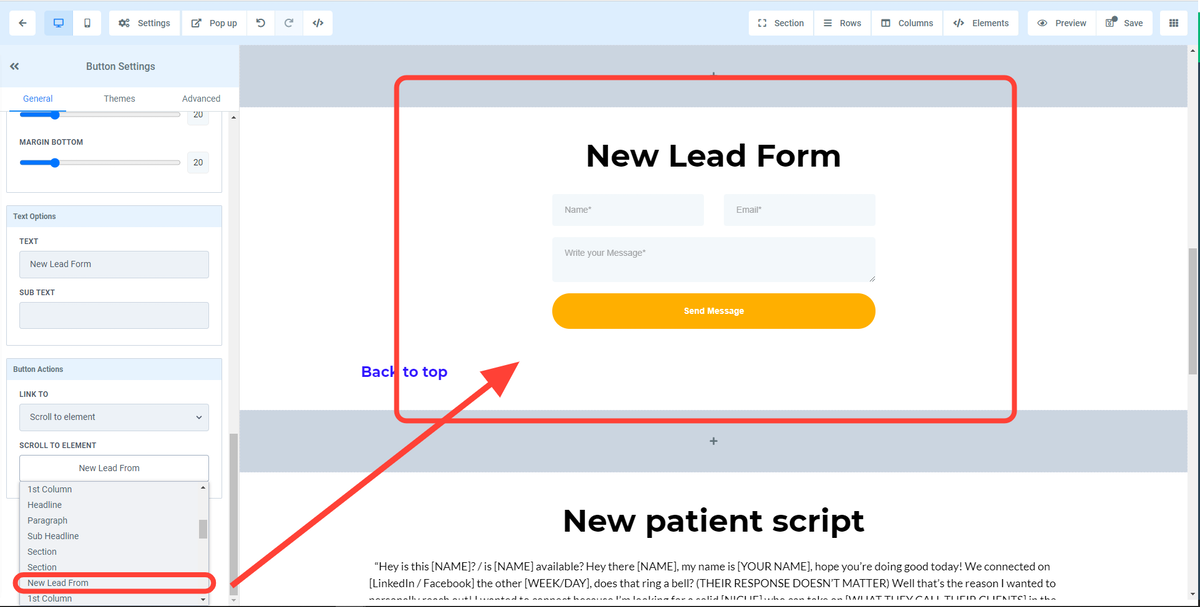
3. Click on “Scroll to Element” dropdown
This will open a dropdown menu of all the section within that page
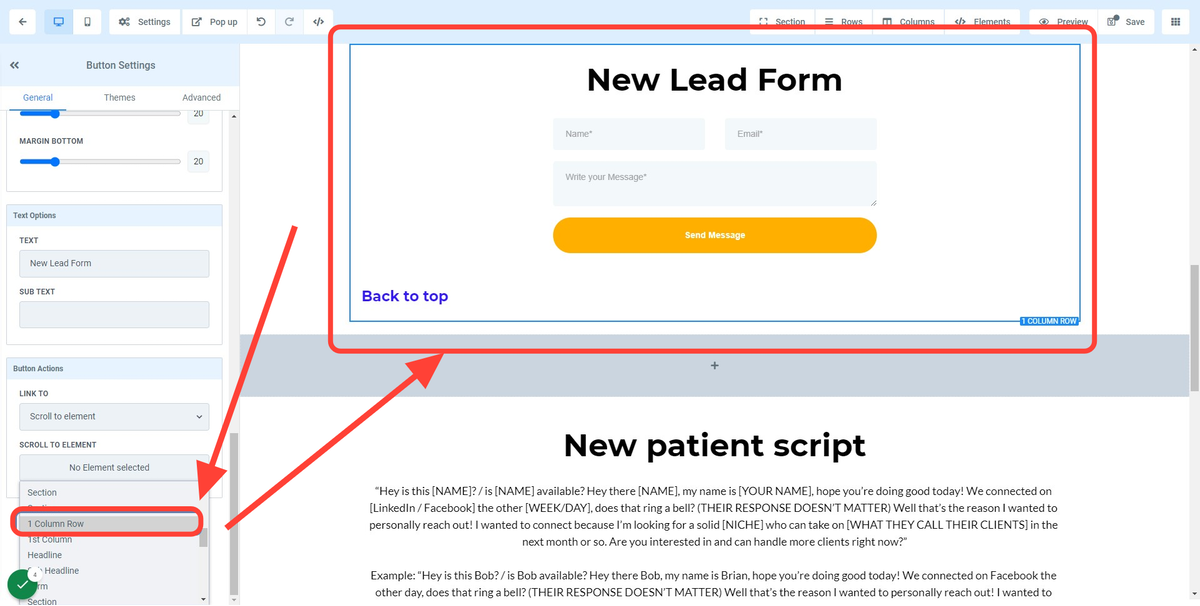
4. Hover and click on the section you wish the button to be anchored too
When scrolling through the options in the dropdown menu you will notice a highlighted box appears around the element (blue in the case). Select the element you wish to anchor the button too.
Note:
The titles in the dropdown menu are auto generated element names.
If you would like to label your sections see Step 5 below.
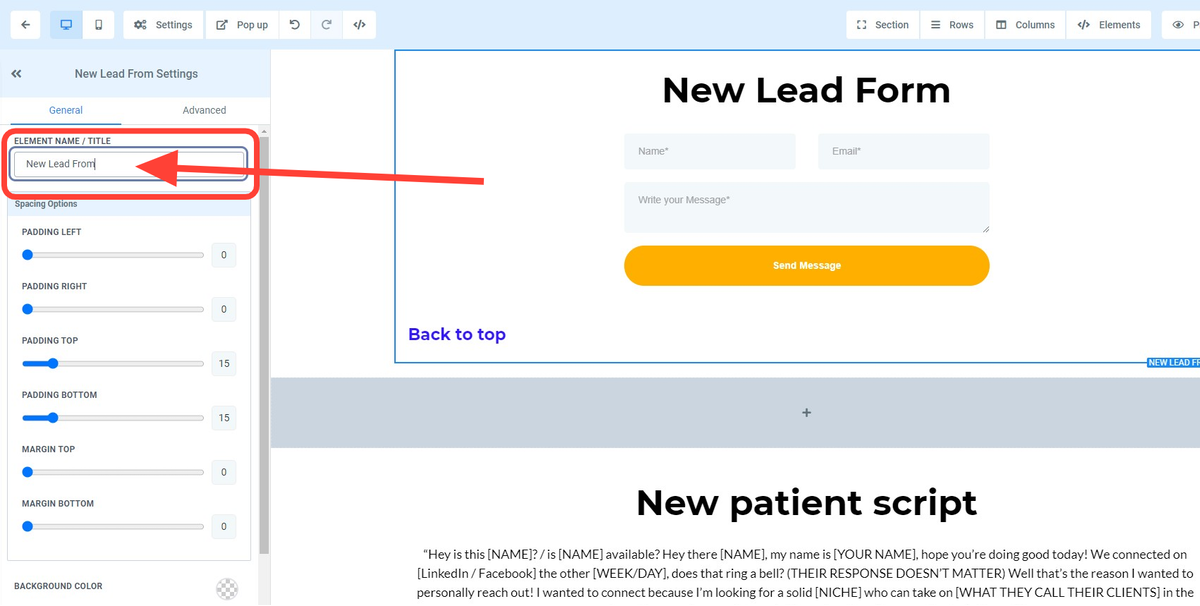
5. BONUS – How to label your sections
Click on the section/ element you would like to Label.
This section will be highlighted when selected as show below
6. Scroll to the top of the left hand side menu
Enter the label you wish to call this section.
For our example we will use “New Lead From”.
7. Proceed to the dropdown menu “scroll to element” option
Once the step above is complete, the newly labeled element name “New Lead From” will appear in the dropdown menu
Make sure to hit “Save” in the top right hand corner and that’s it.
Method 3:
Using the Navigation Menu element in the builder
Important Note:
Navigation menus are global elements, meaning they can be clicked on anywhere they are present.
For this reason we recommend using the URL+CSS selector method to ensure that your links do not break.
-
Ex: https://www.URL.com/funnelpath#CSS SELECTOR
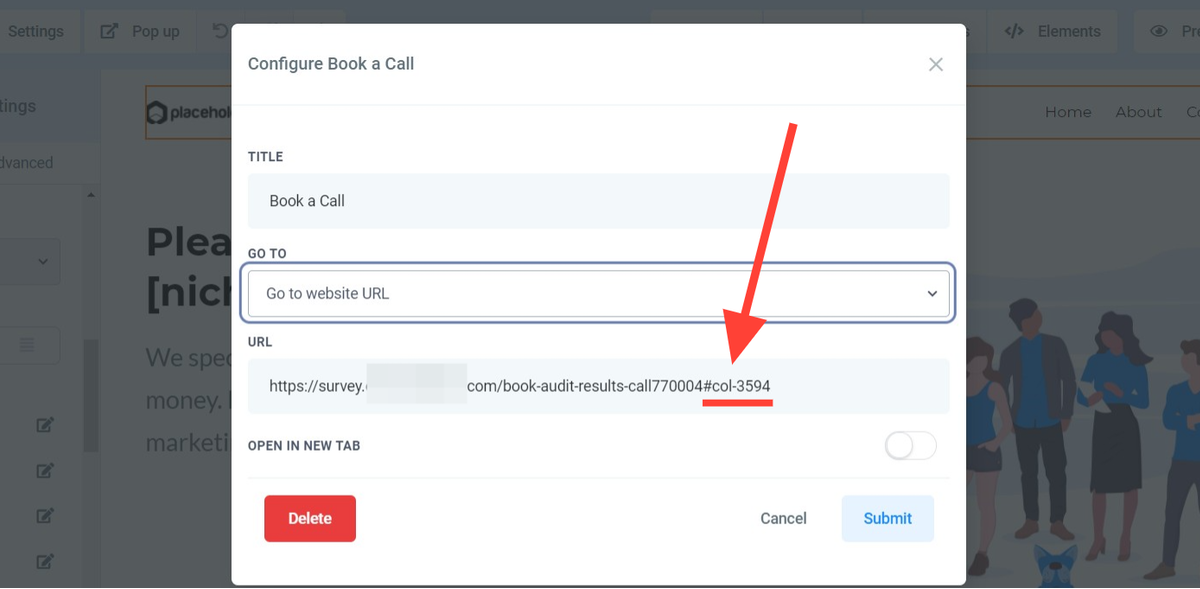
1. Click on NAVIGATION MENU element
For this example we will anchor the “Book a Call” option to a booking widget section located in another funnel/ website.
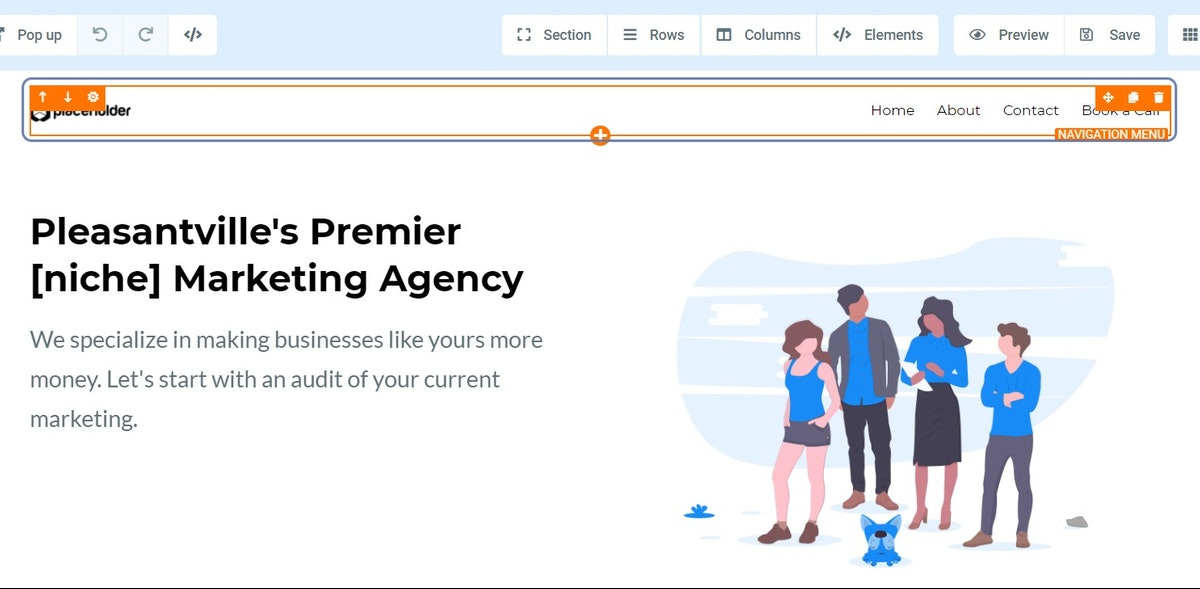
2. Click on the edit pencil next to “Book a Call” located in the left side menu area

3. Click on “Go to website URL”
Paste your redirect URL+CSS Selector:
Ex: https://www.URL.com/funnelpath#CSS SELECTOR
(This will also work for subdomains)
4. Open link in New Tab?
For this option if you would like to open the link in a new tab please toggle this feature on (blue).
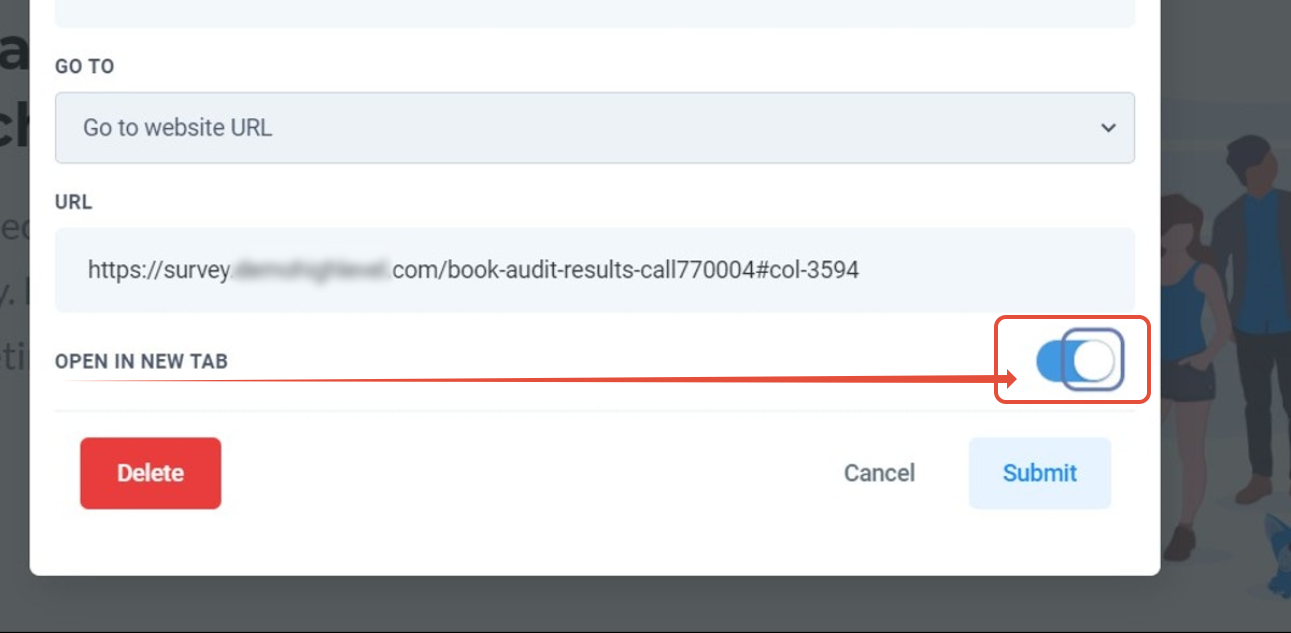
5. Click on Submit
Make sure so hit “Save”, that’s it!
Your Navigation Menu will now open your booking widget in a new tab.


