Note: Now that Workflows are live in all accounts, you can do everything that Triggers and Campaigns do (and more!), all in one builder! Click to learn more about Workflows.
Covered in this article:
Which sender email should the leads be getting the emails from?
How to check if the contacts are assigned or unassigned
Places you can configure the sender email – Manual email
Places you can configure the sender email – Automated email
- Email template
- Bulk action – Send Email
- Workflow Send Email Action
- Campaign configuration
- Triggers – Send email action
Which sender email should the leads be getting the emails from?
| Cases | Unassigned Contact | Assigned Contact | |
| Manual Emails | Logged in user email | 1st priority | 1st priority |
| Location Email | N/A | N/A | |
| Assigned User Email | N/A | N/A | |
| Agency Email | N/A | N/A | |
| Automated Emails | Campaign/workflow settings | 1st priority | 1st priority |
| Assigned User Email | N/A | 2nd priority | |
| Location Email | 2nd priority | 3rd priority | |
| Agency Email | 3rd priority | 4th priority | |
| Review Request Emails | We will always use the Logged in user email as the sender email | ||
| Appointment request emails (calendar settings->3. Confirmation) |
We will use do-not-reply@replies.domain.com depending on the Mailgun subdomain you set up for the location, or the SMTP integrated email | ||
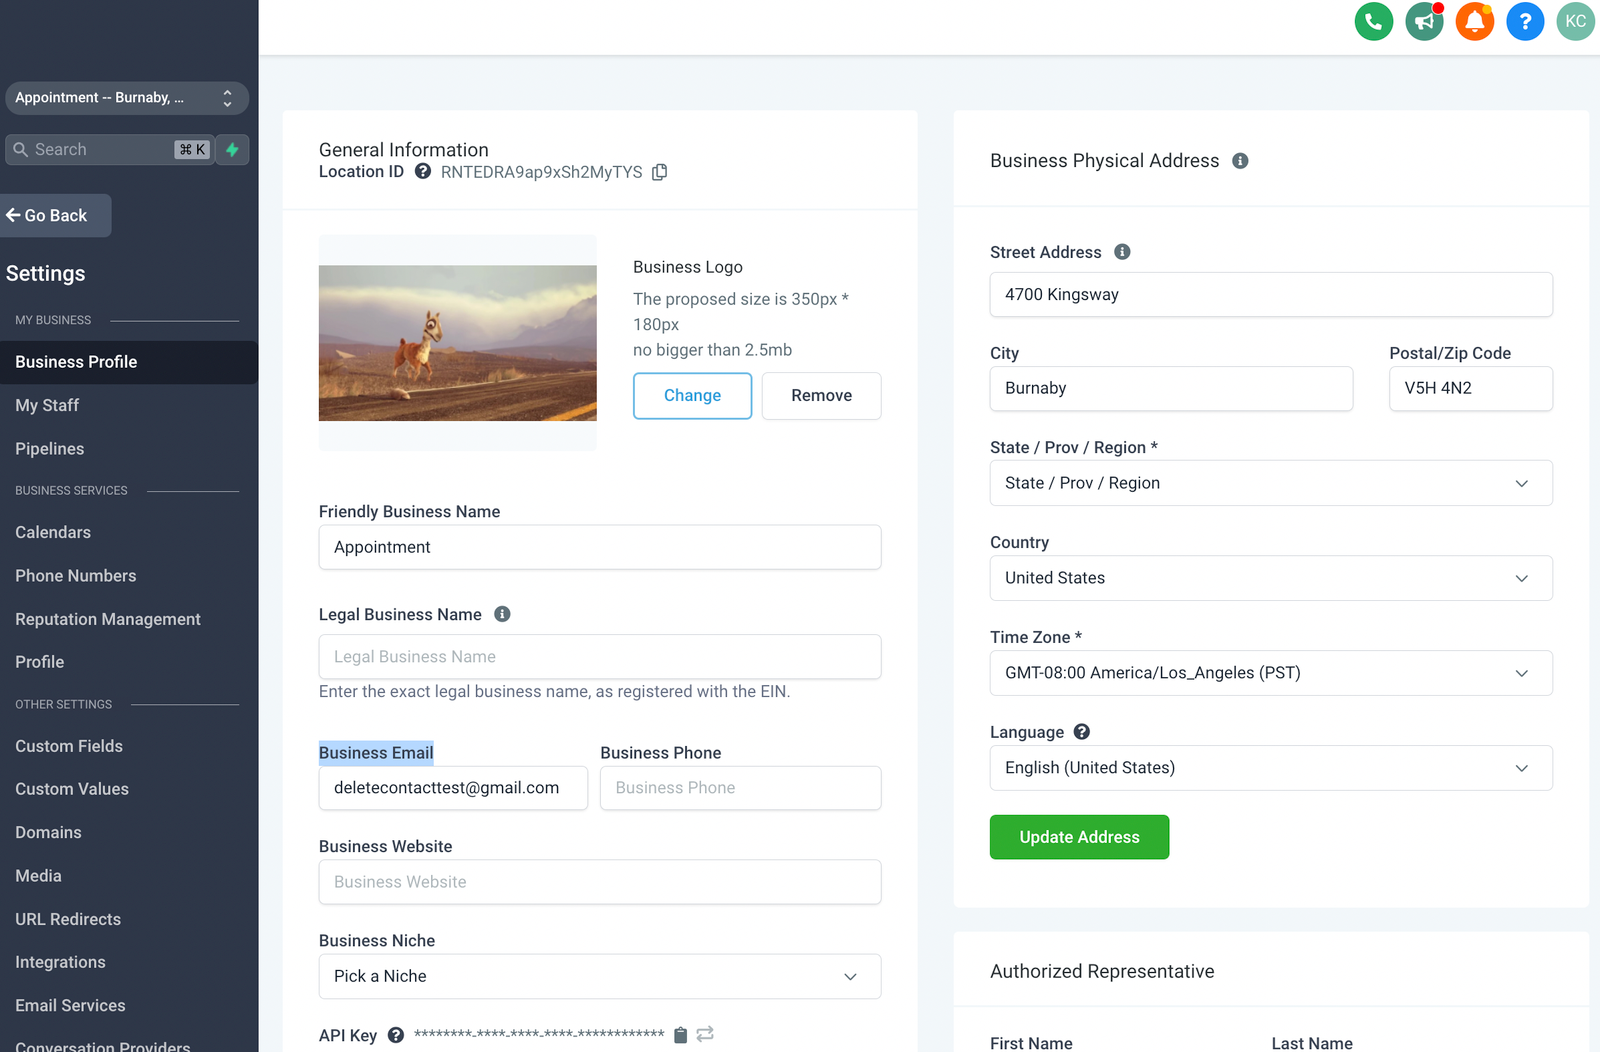
If you are using Mailgun/LC Email, we will use the Business email here if the lead is not assigned:
How to check if the contacts are assigned or unassigned
Search for the contact in the Smart Lists tab
Search Conversations -> Click on the icon on the right to view the Contact Details
Check who is assigned to the contact here:
Places you can configure the sender’s email – Manual email
Conversation tab
The From email will be the user logged in email by default:
However, if you have 2-way email sync set up, the email will show the integrated email:
How to Set Up Two Way Email Sync for Gmail
Two Way Email Sync for Outlook
Places you can configure the sender’s email – Automated email
Email template
Click on Marketing > Emails > Templates > +New

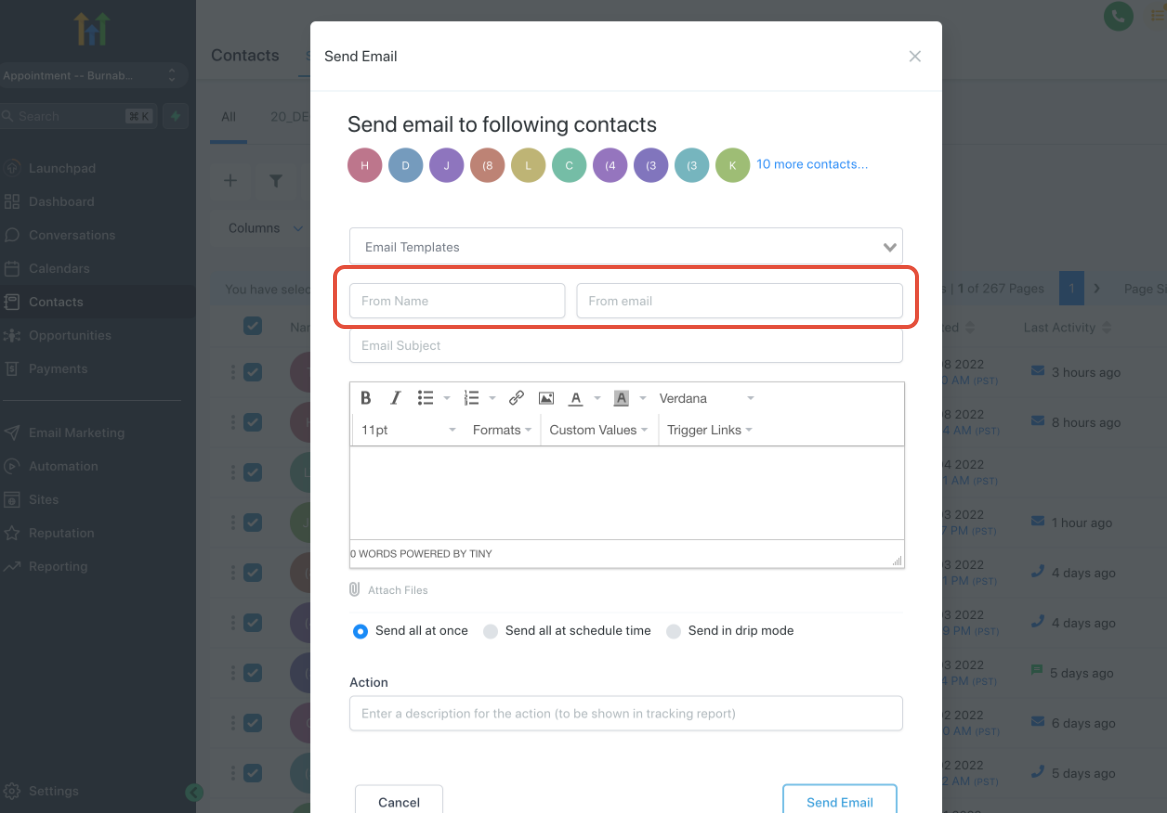
Bulk action – Send Email
Click Contacts ->Smart Lists -> Select Contacts -> Click Send Email
Add the From Name and From Email
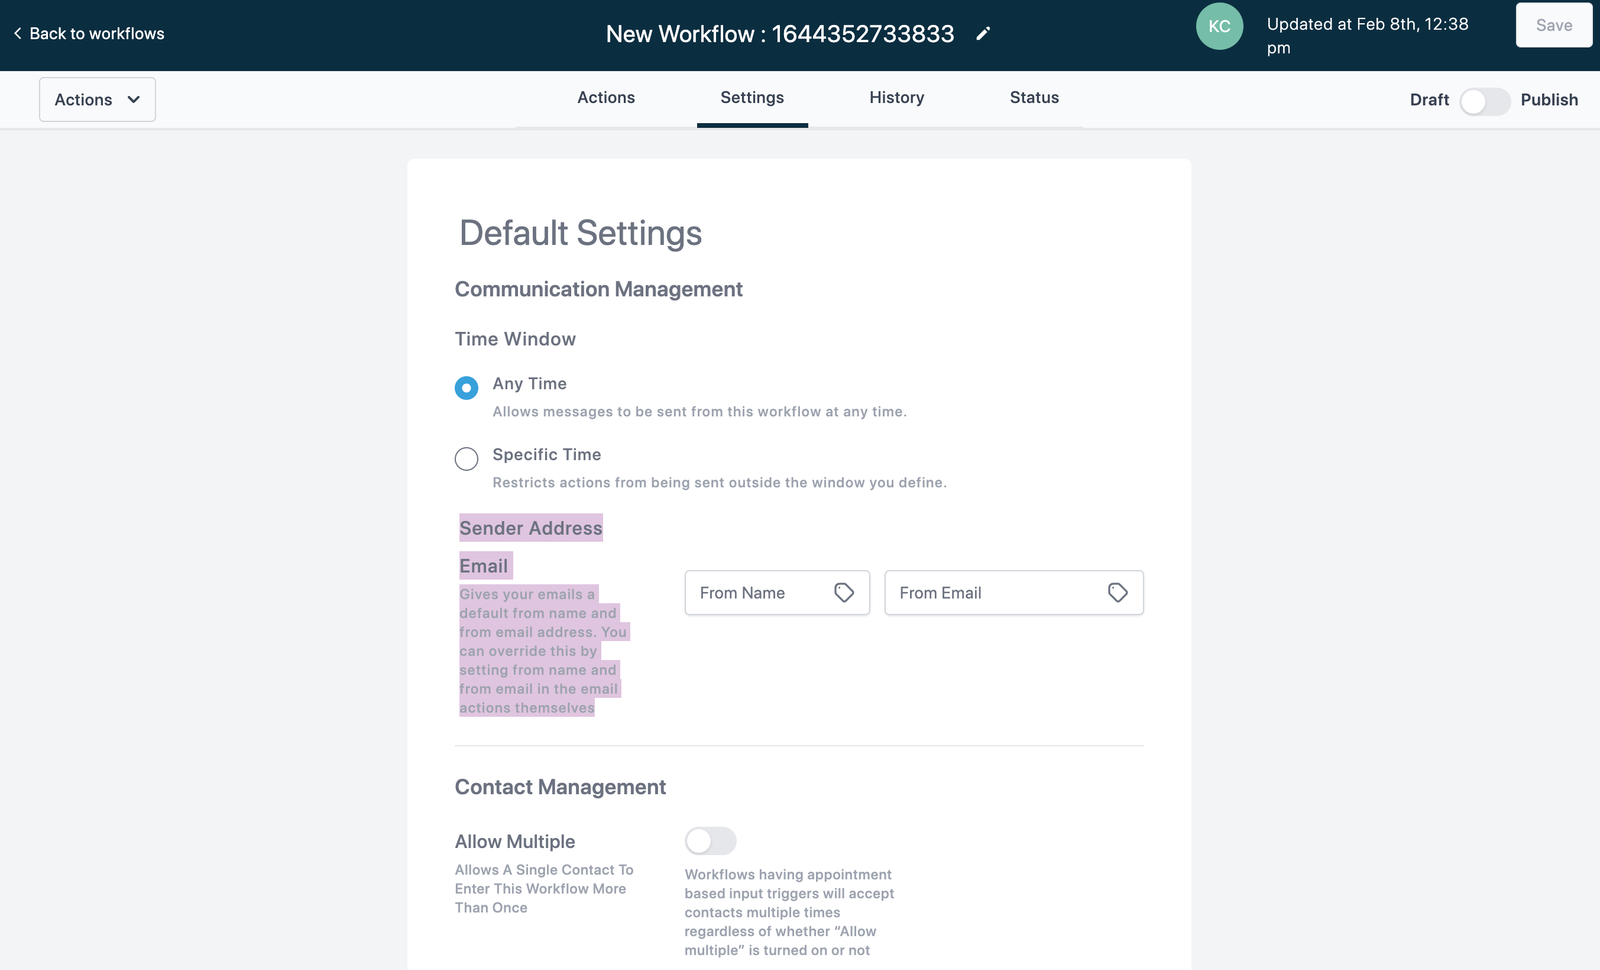
Workflow settings
Click Automation -> Workflows -> Create Workflow
Select Start from scratch and click Create new workflow:
Click Settings -> Configure Sender Address
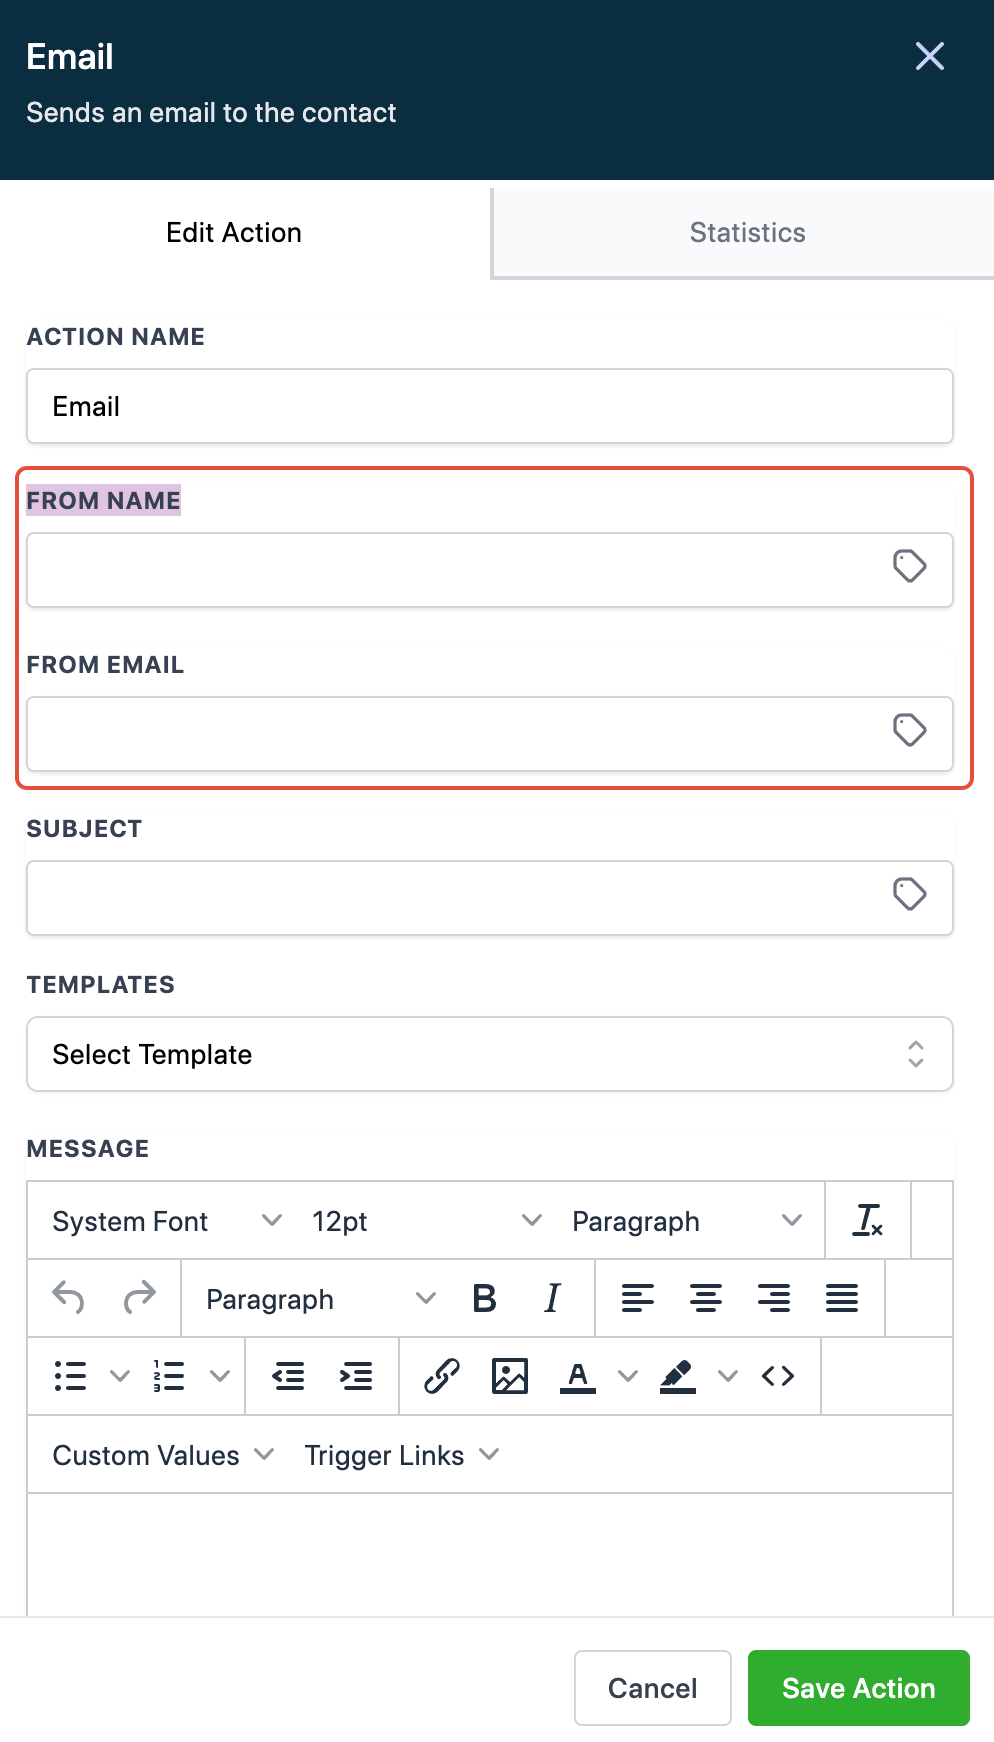
Workflow Send Email Action
Click on the + button > Select the “Send Email” option
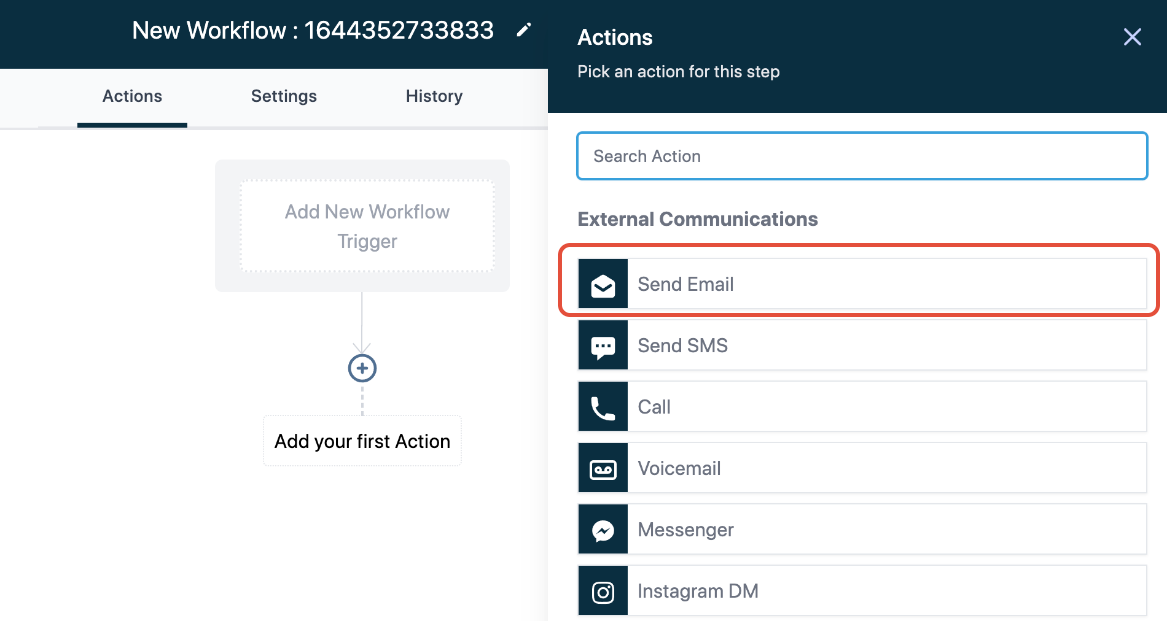
Enter the From Name and From Email
FAQs
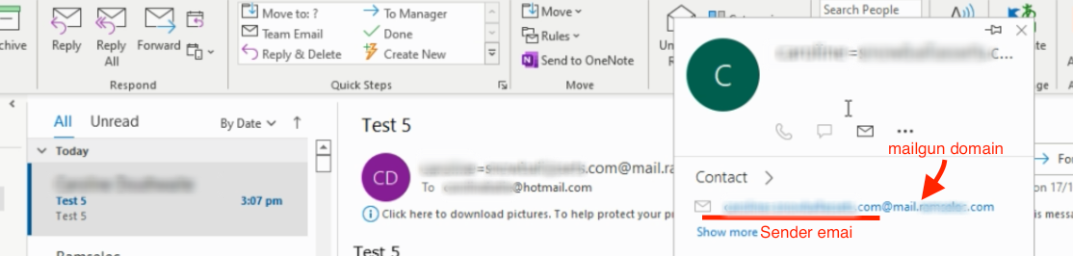
1. Why is the From email for outlook always look long and strange?
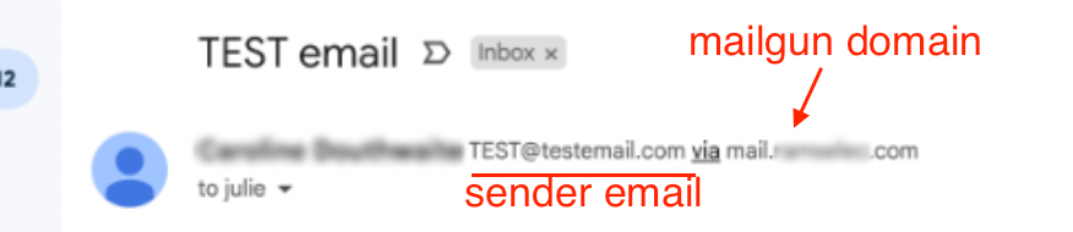
2. How to remove send via information in Gmail?
Make sure to use the same sender email domain that matches the Mailgun domain you set up. Learn more about the Extra info next to sender’s name


